Adding plain text, bold and italics
Overview
Teaching: 0 min
Exercises: 0 minQuestions
How do I add text to a MarkDown document?
How can I make different levels of headings?
How do I make text bold?
How do I format text as italic?
How do I format text as bold and italic
Objectives
Adding text to a MarkDown document.
Formatting text as headings, bold and italic.
Adding text:
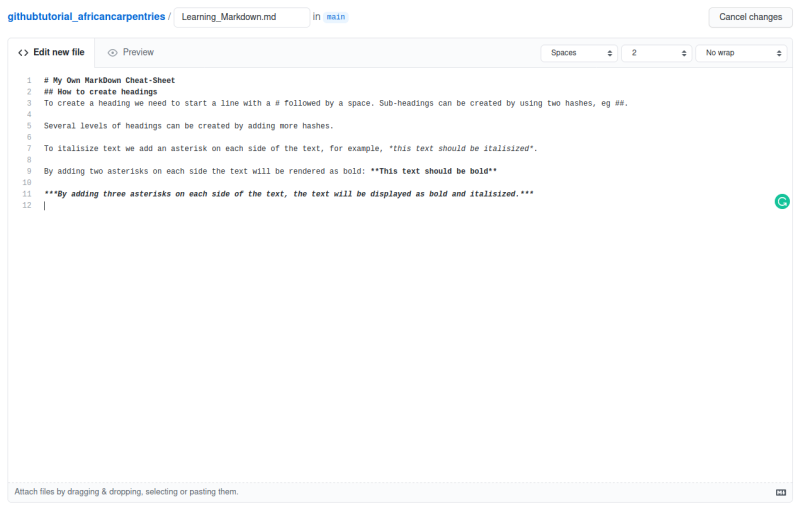
Let’s start creating our document by entering some text in the editor. We’ll make our own MarkDown cheat-sheet and we’ll start it with a heading. To create a heading we start the line with #. Notice the space after the hash:
# My Own MarkDown Cheat-Sheet
We can also create a subheading by using two hashes. Don’t forget the space after the hashes:
## How to create headings
Followed by some text:
To create a heading we need to start a line with a # followed by a space. Sub-headings can be created by using two hashes, eg ##. Several levels of headings can be created by adding more hashes.

To start a new paragraph we need to press enter twice.
We can italisize some of the text by adding an asterisk on each side
To italisize text we add an asterisk on each side of the text, for example, *this text should be italisized*
With two asterisks on each side we can make the text bold
By adding two asterisks on each side the text will be rendered as bold: **This text should be bold**
To make the text italisized and bold we use three asterisks on each side:
***By adding three asterisks on each side of the text, the text will be displayed as bold and italisized.***
By now the text in the editor should look more or less like this:
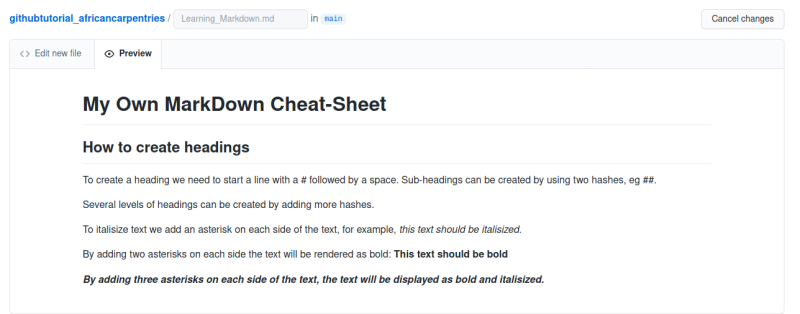
And, if we select the preview, it should look like this:
- Use MarkDown tas to format text
Key Points
Adding text to a MarkDown document.
#is used for headings.
*is used for italic and bold text.